Monday, July 25, 2016

Holy harvest, Batman! It's time for pickling!

Here in Wisconsin it's been quite humid and we've had deluge rains...which...lead to... Holy harvest, Batman!  It's time for pickling!  And consuming...and freezing... :)


These last few years with too many peppers to count and lovely CSA and Z garden vegetables, I've found that I enjoy "quick pickling" as a way of preserving these gorgeous veggies.  This year, I'm doing the "tried and true" peppers/carrots/onions/garlic mixture, but I'm also pickling a few new versions:  tomatillos and fennel, cherry tomatoes, and my own version of regular pickles, aka cucumber "chips".  We'll see how these turn out.  I hope they will be "winners".


Here's the quick pickling recipe for those that are curious:

Brine:
3 1/2 c. water
2 1/4 c. vinegar (I used a mixture of white vinegar and apple cider vinegar)
6-7 T. kosher salt
6-7 T. organic sugar
dried herbs (parsley, dill, sometimes oregano) and whole black peppercorns

Veggies:
variety of peppers, sliced (I use my mandolin)
peeled, rough chopped garlic cloves
peeled, sliced carrots (again, I use my mandolin for a consistent cut)
peeled and chopped white onion


Pack veggies into clear, dry jars.  Dissolve salt and sugar in water first, then add vinegar.  Heat on stove until boiling.  Remove from heat.  Pour over peppers in jars.  Cover immediately.  Let cool on counter, then refrigerate.

Ready in about7-10 days for eating!  Num num!

**I use upcycled jars for my pickled goodies - the red and white lid jars are Bonne Maman jam jars (aren't they cute?!) and jars from other pickled goodies, jams, spices.**

Monday, July 11, 2016

Z Garden Harvests and Glimpse in the Kitchen

 The Z garden and yard is in full summer mode and the weather has been very suitable for great garden growth.  It's been a busy week and a half of so in the Z Garden and kitchen...harvests and herb prep for the table, freezer, and spice cabinet!  With basil from our lovely CSA and our Z garden, I was able to prepare basil pesto for the table and freezer, and our dried herbs were ready for whirring in the food processor and storage in upcycled jam jars.

There are now a few glimpses of color in the harvests now with a few beets, carrots, and a few random schmaters and raspberries.  Soon there will be a color explosion.  Can't wait!

Hoping you've all had a great week and a half or so, and I hope you're all enjoying your summer!


Friday, July 1, 2016

After a long hiatus...I'm back!

I didn't intend to take a few YEARS hiatus from blogging...eek!!!  Life happens, in a very good way.  After a long hiatus and with encouragement from friends and a few co-workers...I'm back!  I'll be sharing my journeys and joys of  my love of food, cooking, recipes/recipes with my Jen'isms and tweaks, kitchen/gardening tips and tricks, and any other related thoughts that cross my mind.

It's summer in Wisconsin, and the Z Garden is in full-swing (with special thanks to my hubby for his hard work...he plants and is the "care giver" and I'm the harvester) and is providing us with some yummy additions to our table.  Green goodies, such as spinach and lettuces, abound so far.  We have also picked many spicy radishes, and "round two" are peeking through the ground.  Color is coming soon (carrots, beets, tomatoes aka schmaters).  We partake in a wonderful CSA through our work, as well, so with CSA veggie shares and our garden glory we are able to get creative with "recipes" and meals, which we quite enjoy. 


I experimented a bit this past week and was able to create a yummy pesto:  Garlic Scape and Cilantro.  YUMMMMMMMYYYY!!!  Garlic scapes, lemon balm, cilantro from our CSA (and a friend's CSA!) were combined in the food processor with grated parmesan cheese, peeled garlic cloves, and roasted and sea salt pepitas (pumpkin seeds). 


I freeze the paste mixture in small containers without olive oil in order to preserve the flavor and texture.  The pesto can be thawed out the evening before in the refrigerator, and when it's ready to use, olive oil is added to taste, to desired consistency. 


This bright and garlicky pesto will pair nicely with grilled meats/veggies, pasta, even as a salad dressing (in addition to olive oil, just add your favorite vinegar to taste). 


Guten appetit!  Bon appetit!  Noosh-e-jan!

Hope you are all having a great start to your summer.  Thanks for following my journeys!


---Jen


Thursday, May 22, 2014

Hello food lovers!  Boy, I can't believe how long it's been since I posted!!!!  Too long. . .I hope all of my WI peeps are enjoying spring. . .finally, it has arrived I think!

While I like meat burgers, I am always trying to find the next, best veggie burger, too!  I decided to try my hand at making my own version of black bean burgers for our dinner last night.  I think they were a success!  Nice texture, flavor, substance!  NUM NUM!

Here is my recipe with Jen tweaks, as always:

JEN'S BLACK BEAN BURGERS
 
INCREDIENTS:
(2) cans organic black beans, drained
1 c Irish quick cooking oats
2 organic eggs
2 scallions, finely chopped
1/4 cup shredded carrots, finely chopped (I purchased preshredded carrots to save a step!)
1/4 small zucchini, skin on, finely chopped
2 T. finely chopped cilantro
1 small jalepeno, finely chopped (adds a nice spicy flavor!)
cumin/sea salt/pepper to taste
yellow cornmeal for dusting
olive oil for fying
griddle/frying pan
sour cream/avocado slices/sliced red onion/shredded romaine lettuce/salsa for garnish
hamburger buns


Directions:
1.  In a food processor with mixing blade attached add oats.  Pulse 3-5 times to get a course grind.
2.  Add 1/2 of drained black beans and two eggs.
3.  Pulse until you get a smoothish paste.
4.  In bowl, add remaining black beans.  Mash with potato masher by hand, leaving chunky.  This allows the burgers to have a nice, consistency/substance instead of being mushy.
5.  Add black bean/oat paste to the bowl of mashed black beans.  Also, add in carrots, zucchini, cilantro, jalepeno, and spices (to taste - approx 1/4 t. pepper, 1 t. salt, 2 t. cumin).  Mix by hand until you get a nice mixed product and consitency you like.
6.  Put a piece of waxed paper on a cookie sheet.  Lightly spreay waxed paper with your favorite oil spraay (I used organic olive oil spray).
7.  Pour approx 1/2 c. - 3/4 c. yellow cornmeal on plate to use for lightly dusting of patties. 
8.  In your hand, take a dusting of cornmeal and an ample portion of the black bean burger mixture.  Roll in to ball, dusting your hand/mixture as needed with cornmeal for it to not be sticky.  Press out lightly onto cornmeal on plate and press in to hamburger patty shape, then place on oil-sprayed wax paper.
9.  Place patties in refrigerator once patties are formed in order to allow the mixture to set up nicely (at least one hour).  For best results freeze patties for several hours.
10.  Lightly oil griddle/fying pan.  Place patties on griddle/frying pan and fry until crispy coating from cornmeal forms - approx 5-6 min per side.
11.  Serve on hamburger buns with garnishes of sour cream/avocado slices/sliced red onion/shredded romaine lettuce/salsa.  DIG IN!  YUMMY!  ENJOY!

 
-Jen


Sunday, September 23, 2012

Peppers - Part 2!

Here's the final product of the pepper drying:  Crushed Peppers for our cooking!  Don't they look HOT...and delicious? :)

Saturday, September 22, 2012

First Day of Fall, Last Day of Garden Harvest

Well folks, it's the start of my favorite season here in WI - FALL!!!!  I love everything about it. . .ok well there are two things I don't like about it:  1) The length of the season is WAY TOO SHORT 2) And my skin will begin to get itchy and scratchy.  But I love the smells, the colors of the leaves, the cool breezes, the crisp a.m. air, pumpkins, apples, apple pickin' with the fam, walks in the 'hood, h.s. football games, no a/c. . .What's not to love?

Here are a few photos of the last of our garden harvest today:

All of the tomatoes will be stored in paper bags in our garage so we can still enjoy fresh garden schmaters for several more weeks - they ripen up well in paper bags, like a banana or avocado would.  If you haven't ever tried it, you should! 


Our fresh mint has been washed, placed on paper towels, will be left to dry out for several weeks in a cool, dry location, and once it's dried it will be crushed and used in a variety of the dishes we cook here in our household!


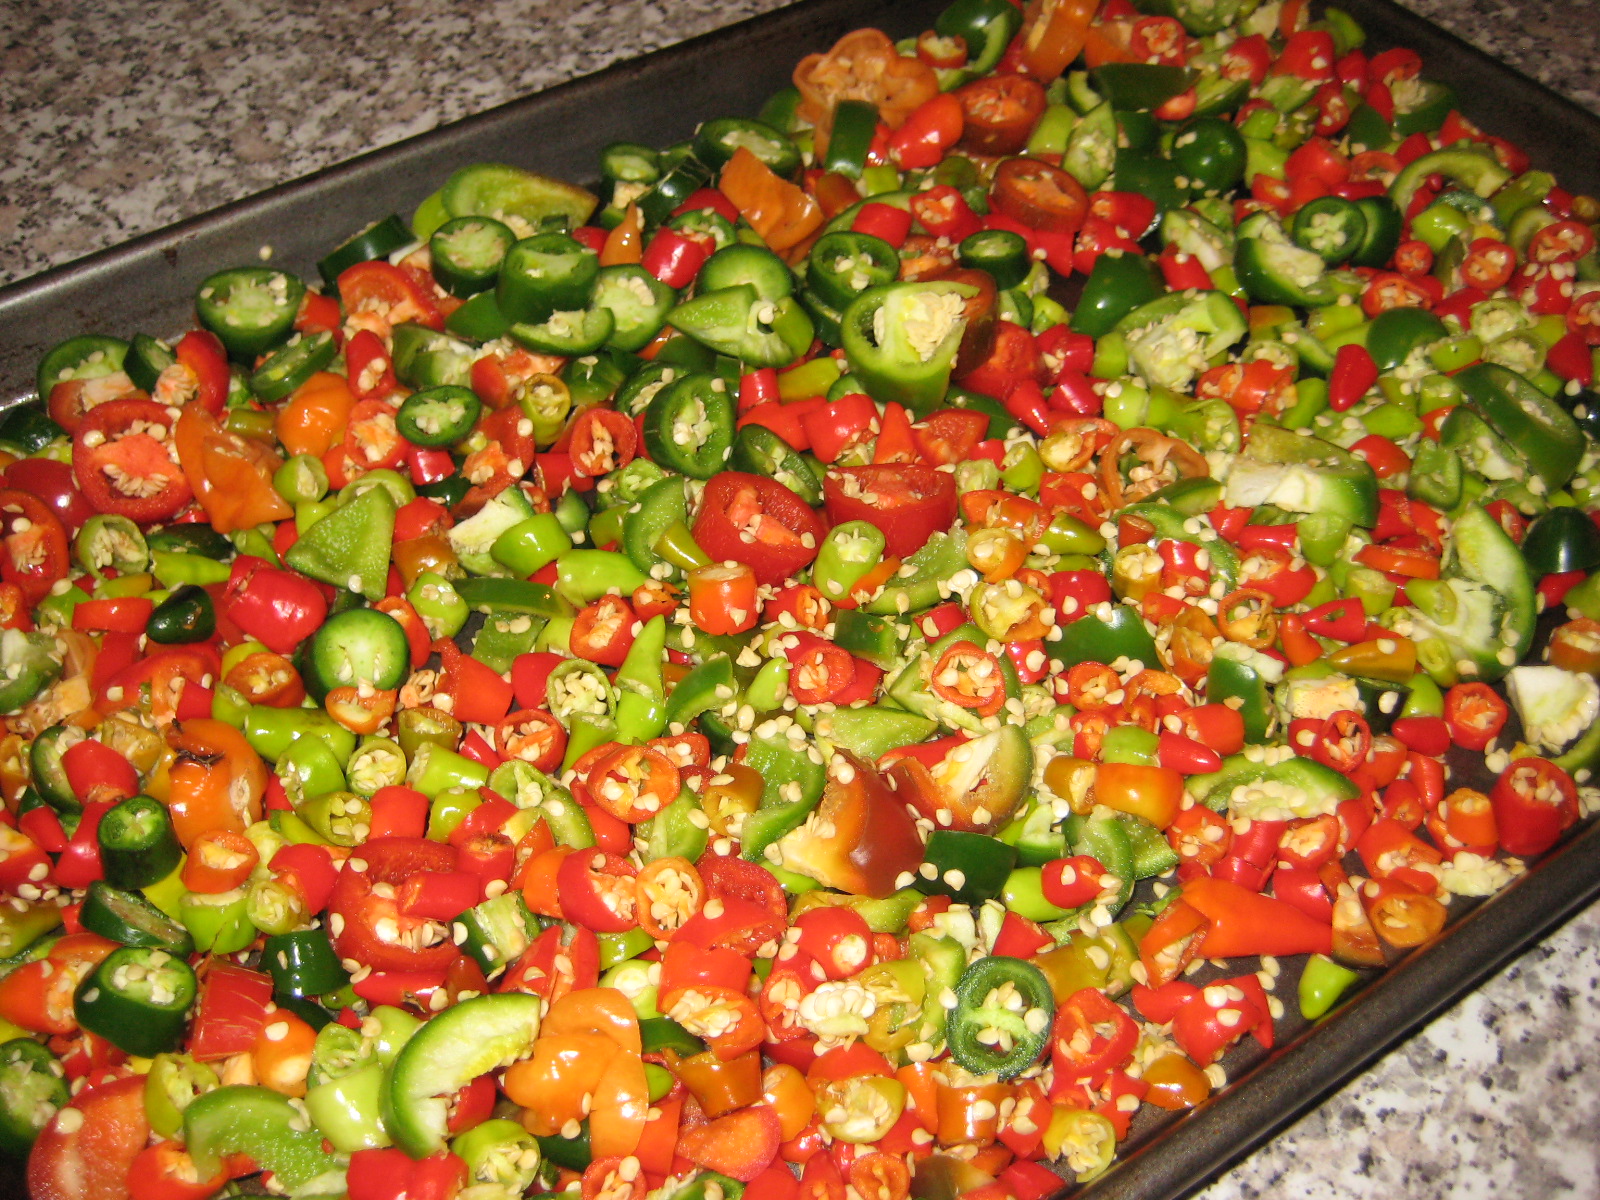
And, last but not least. . .HOLY PEPPERS!!!  Ali grew ALOT of hot peppers this year and we have TOO MANY!  Jalepenos, thai chilis, Hungarian hots. . .They have been washed, sliced/chopped, placed on a cookie sheet in a 160F oven.  Leave them in the oven at this temp to dry out at least 6-8 hrs.  Let them cool.  Place in blender or food processor and make into a spicy powder, great for ethnic dishes!  Or you can chop up the dried pieces and make your own "shaker peppers" for pizza. . .and other dishes! :)  DELISH!


Happy First Day of Fall!!!!
XOXO
Jen

Monday, September 17, 2012

Chicken Cacciatore. . .Amore'!

Goodness, it's been awhile since I posted a recipe or anything food related on my blog!  It's been busy busy busy and now it's almost fall here in WI!  My FAVORITE TIME OF YEAR!!!!

So, to honor that, I made Chicken Cacciatore for dinner!  This is a version of Giada's recipe - ok, all you men put your eyeballs back in your head and your tongue in your mouth, do you hear?! :)


I tweak this recipe, depending on what all I have in my pantry and refrigerator!  You can add fresh chopped zucchini or 1/2 can artichoke quarters for example! :)

Here's how I made it tonight:

Chicken Cacciatore

Prep time:  15 min
Cook time:  40-50 minutes
Serves: 4

4-5 boneless chicken thighs
1-2 chicken breasts ( you can use more 2-3 more thighs instead, if you wish -the dark meat gives this dish a nice richness)
2 t. salt, or to taste
1 t. freshly ground black pepper, or to taste
Wondra flour for coating the chicken (find it in the baking aisle, near the flour - it's a fine flour, perfect for sauces!  I always have this in my spice cabinet!)
3 T. olive oil
1 med bell pepper, chopped (optional . . .can use jarred red peppers, too - 2-3 large ones, sliced)
1 medium onion, chopped
3 fresh garlic cloves, peeled and chopped
2 medium carrots, peeled and chopped
1/2 package button mushrooms, cut in 1/2
3/4 c. white wine (plus some  for the chef!  optional. . .I made this without the wine tonight. . . and drank a glass instead!)
1 can diced tomatoes with juice/liquid (14 oz.)
3/4 c chicken broth/3/4 c. veggie broth
3 T. chopped green olives with pimentos (optional. . .I didn't use tonight, but this adds a nice acidic, briney taste to the dish. . .I'm not a capers fan believe it or not, but you can use capers instead - again, optional)
2 t. dried oregano
1/4 c. chopped fresh basil leaves - or more if you wish!

Sprinkle chicken with 1 t. of salt/pepper.  Dredge with Wondra flour to coat lightly.  In a large saute' pan, heat oil over medium heat.  Add chicken and saute' until brown, about 5-6 minutes per side, or until golden brown.  If all chicken doesn't fit, do in two batches.  Remove chicken from pan and set aside.  Add pepper (optional), onion, garlic, mushrooms (optional), and carrots (optional) (this is when you could add the zucchini if you are adding it, as well as the artichokes)  to the same pan, using the chicken drippings, on medium heat for about 5 minutes, or until onions are translucent.  Season with salt and pepper to taste.  Add wine and simmer until reduced by half, about 3-5 minutes.  Add tomatoes and their juice (liquid), broth, capers/olives (optional), and oregano.  Return chicken to the pan with the sauce and turn them to coat in the sauce.  Bring sauce to a simmer.  Continue simmering over medium-low heat until chicken is cooked through, approximately 20-30 minutes.

Serve with pasta of your choice and a sprinkling of Parmesan cheese (freshly grated is always best, but sometimes "pizza Parmesan" does suffice!) . . . slices of a nice, crusty artisan french bread. . .and your favorite white wine! :)
Enjoy!

Welcome fall!